Arduino
Where do i start with this, it took me so long for me to understand how the basic works I didnt really have much time left to play around with the more complicated things. So I only managed to use LED, RGB LED, and LCD Screen.
Blink
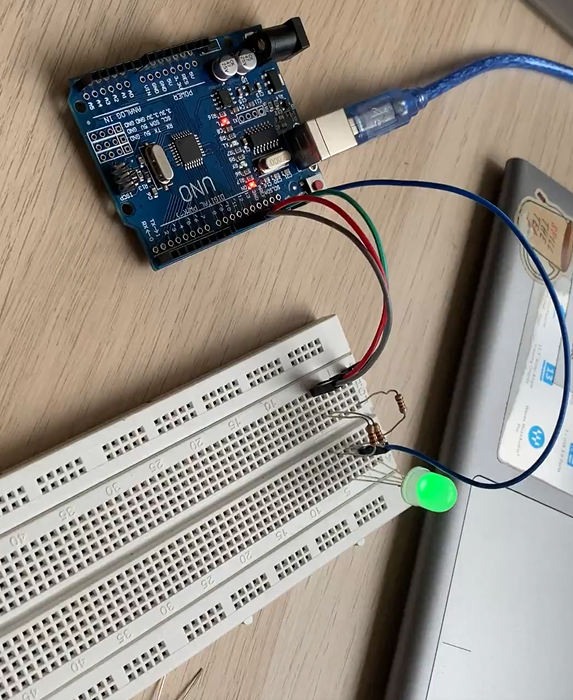
Not going to lie Mr Chew i spent about a month just trying to connect this circuit.
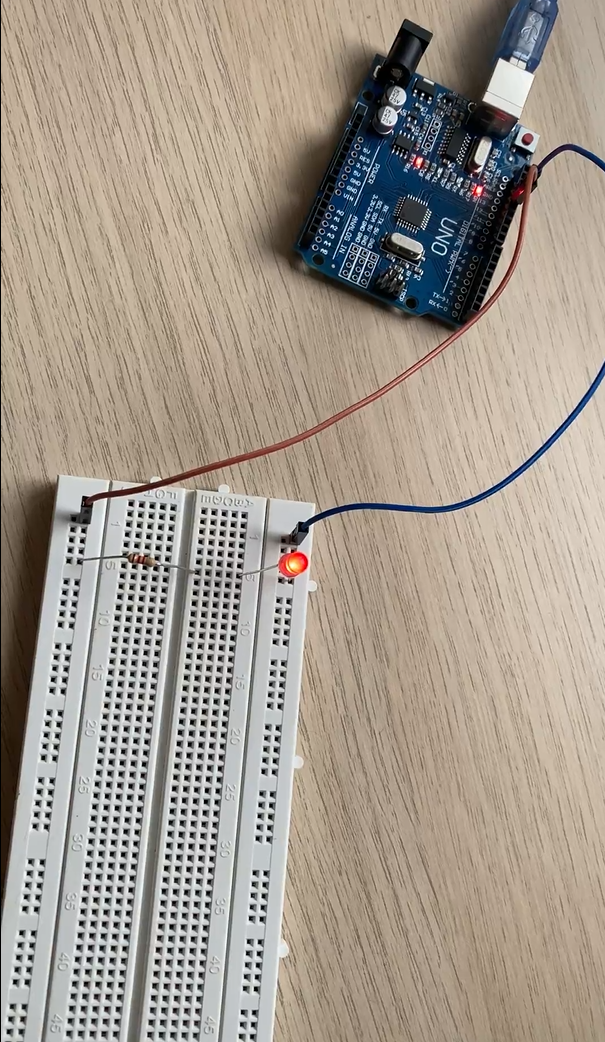
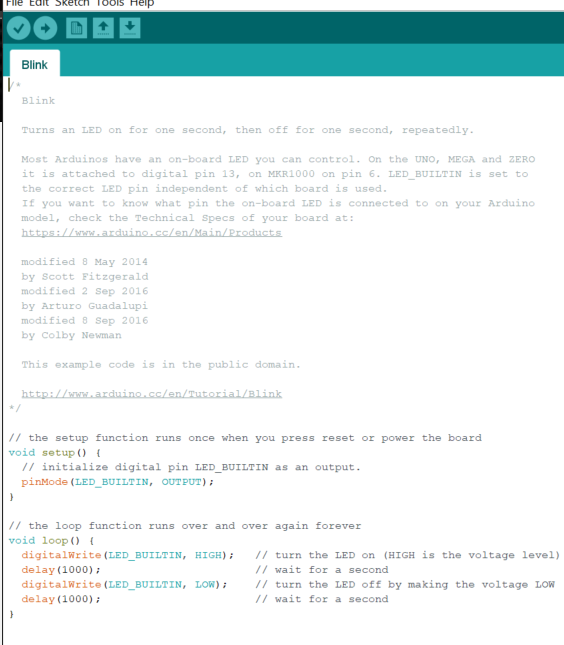
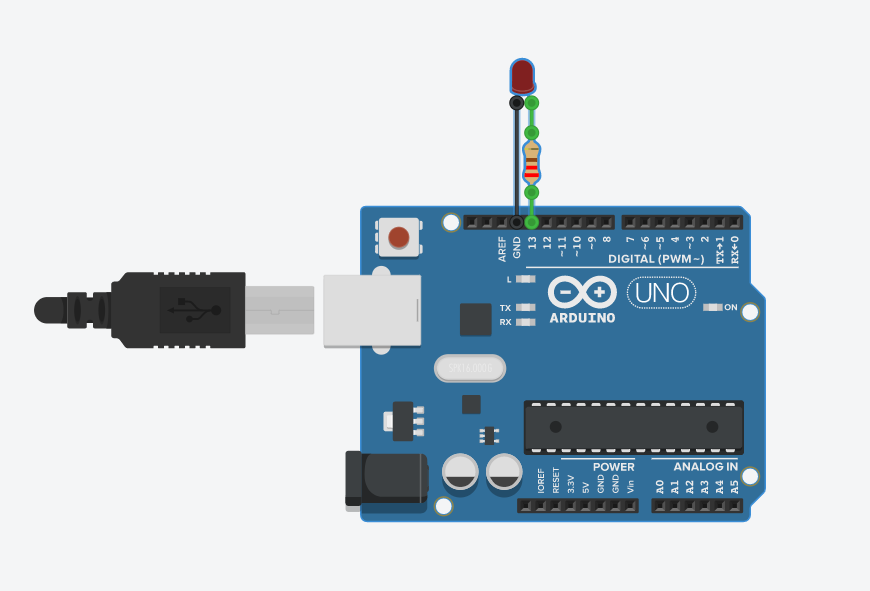
This is the most basic set up for a LED. It programmes the LED to blink (turn on and off). This code it is set to 1000 or 1 second. If the number is increased, example 5000, the LED will turn on every 5 seconds then turn off for 5 seconds.
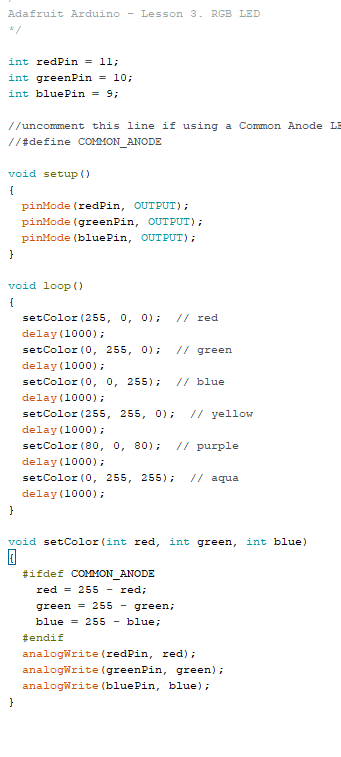
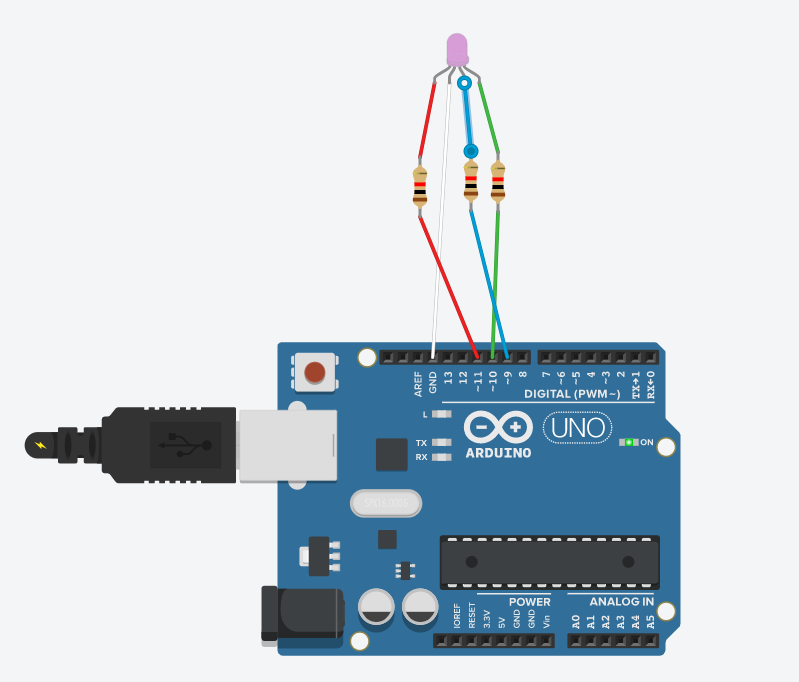
RGB LED
The RGB LEDs that were given to use were common anode LEDs.
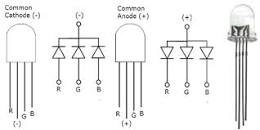
RGB LEDs are red, green, blue LEDs. RGB LED products combine these three colors to produce over 16 million hues of light. Note that not all colors are possible. Some colors are “outside” the triangle formed by the RGB LEDs. Also, pigment colors such as brown or pink are difficult, or impossible, to achieve.
Now, similar to blink setup that I did previously, now I wanted to set different colours to the LED and set it to change colours at interverals.
LCD Screen
LCD= Liquid Crystal Display. For this, I followed the Hello Word Tutorial using a 16x2 LCD screen that was provided by school.
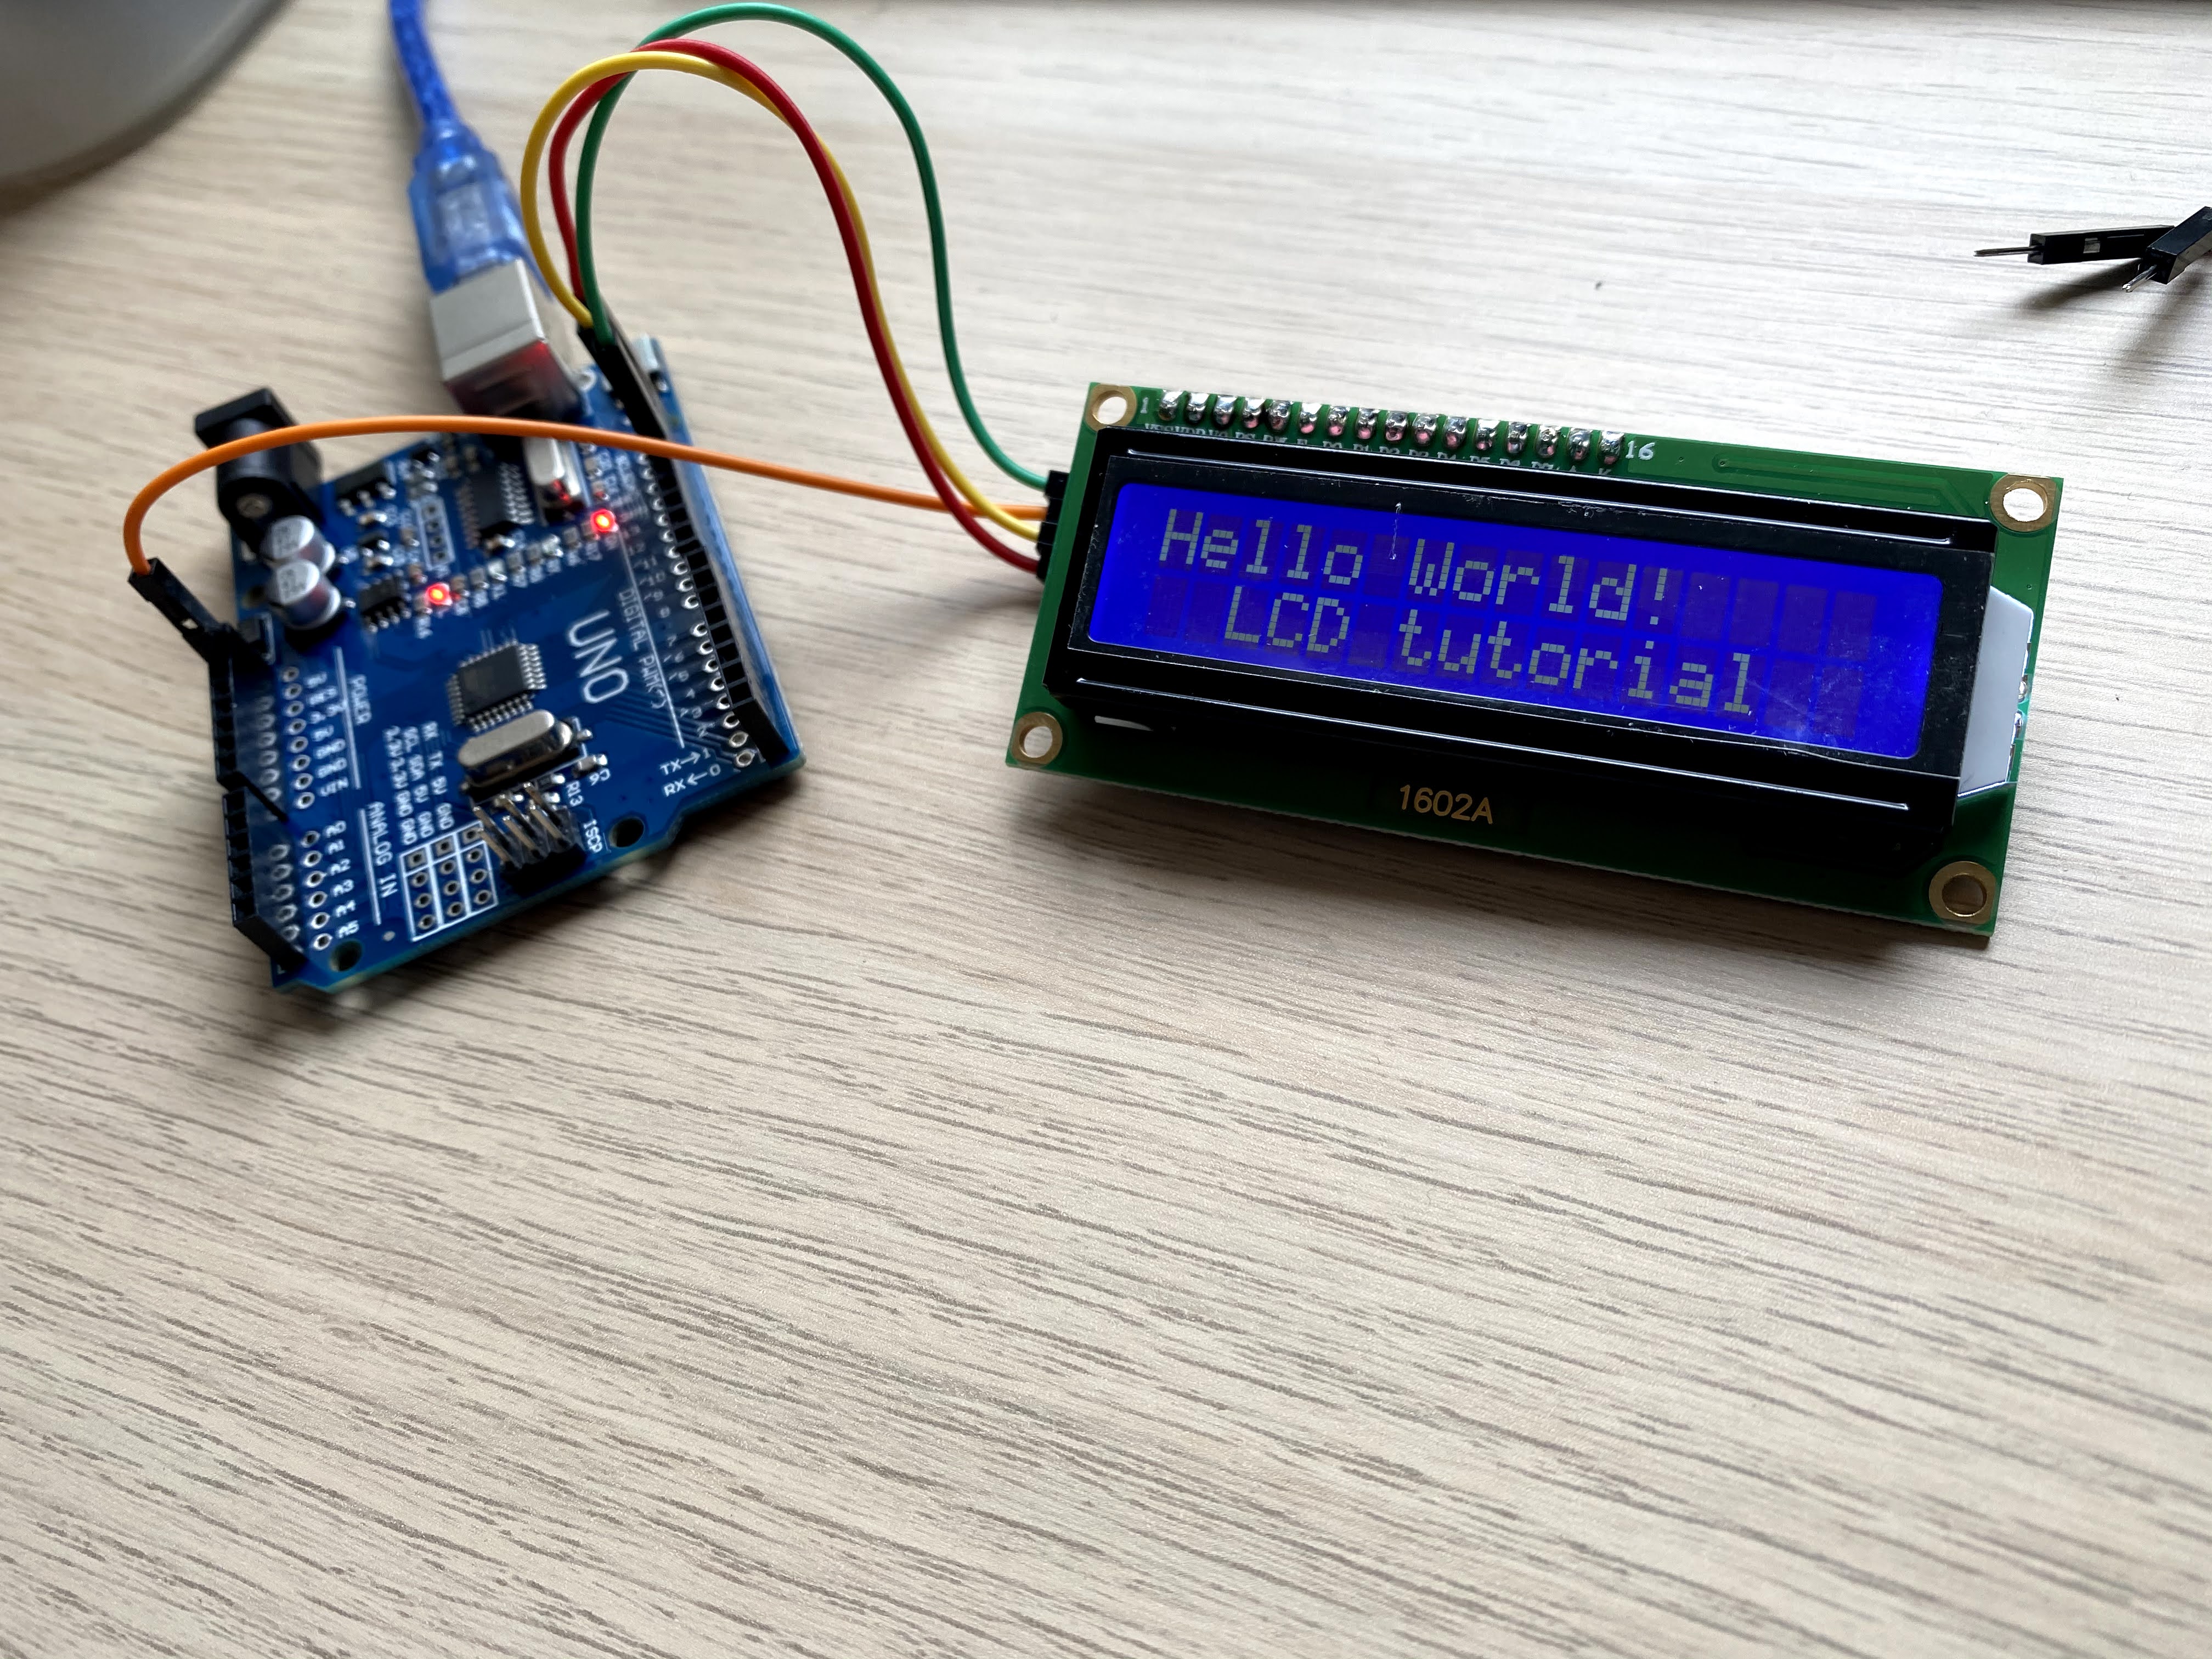
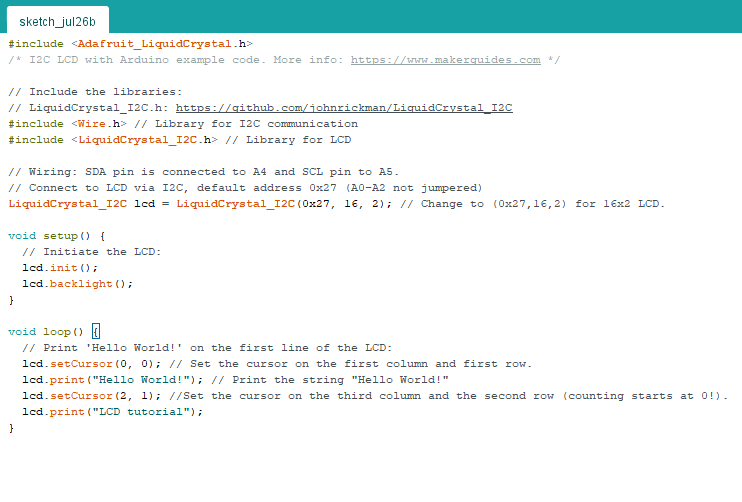
I followed some online tutorials as well as lecturers when Mr Rodney was going through this in class. As the LCD display that was provided was already simplified and did not rquire us to do the extra soldeting and conection, it was easier for me to understand how to connect the circuit together.
Characeter LCD Tutorial Controlling I2C LCD with ArduinoSide Note
I did not try out the other devices that were provided for us (stepper motor, ultrosonic sensor...) as I was not interested to use them for my project and did not have enought time to play around with them.